Tuesday, January 17, 2012

Pottery Barn Black - The Dresser Painting Experiment


The kiddos and I found a bargain dresser for $25 at the thrift store a couple of months ago. Daughter #1 claimed it. She thinks it's beautiful. Ug.


It's been sitting on the back porch just waiting for some attention. Realized a little belatedly that I didn't take true "before" pictures so you could see the true, uh, beauty of this piece, so just imagine it put back together.

My parents used to have something like this years ago...with a big ol' mirror on top.


Theirs didn't have chewed up corners, though. Just sayin'.


Stripped off the hardware. Like my fancy screwdriver? For the life of me, I couldn't find any other Phillips screwdrivers. My kids are grounded.


All drawers out and ready to sand...


Getting fancy here, I know. The finish was actually pretty good, so all I did was rough it up a bit with some 220 grit sandpaper. Make sure to sand with the grain. Like the left handed sanding action photo? That's because my action photo skills need some work.


Rust-oleum black satin spray paint was recommended by a friend of mine who is a furniture painting guru.


Taped off the drawers for painting. Really could have done a better job of the taping but I was in a hurry. Not good, because that means I had to sand off the overspray later. So much for hurrying. Put on three to four coats and used three cans of spray paint. Total cost? Less than $15.00.


I was going to replace the hardware, but my daughter (who laid claim to this dresser) nixed the idea. When it went back on, I kind of liked it. It works.


The full effect...


Roughed up the edges a bit to give it a worn look. It kind of brightens it up, too.


Dresser is in my room until the girls have space in theirs. Not sure I'm going to want to give it up!

Just realized that I forgot to take pictures of the mirror before it was painted to match. It will hang above the dresser. It used to be gold. Now it's a lovely satin black with a little gold peaking thru. Flash from the camera on the beveled edges is giving it that tic-tac-toe look. =] 

The tall dresser on the right is now on the back porch waiting for a facelift. It got sanded today. New pics soon...

Friday, November 18, 2011

Pumpkin Cheesecake Bites Recipe

This is just a quickie because it looked so darn good.
 IMG_4037picnik.jpeg
Black Bottomed Mini Caramel Pumpkin Cheesecake Bites...and those Kisses on the top are called Pumpkin Spice. And is that a gorgeous picture or what? I can just see this for a Thanksgiving dessert! The recipe is at Picky Palate. Check it out! =]

Sunday, October 30, 2011

Pumpkin Carving Ideas

I've come across some fun pumpkin ideas lately and wanted to share.

Love the idea of taking a drill to a pumpkin and making a nice, easy job of it. MY kind of carving, let me tell you!

Holiday Road / Great idea! (use a drill to make a polka dotted carved pumpkin)
Here's another holey one. Simple, simple, done!


A little creepy, but I like it....I'm a nursing student these days so it's OK, right?


Because I like the googlie eyes and I remember what it's like to do pumpkins with little ones. How cool and simple is this?

monogram pumpkins
Momogram pumpkins via Martha Stewart, because someday I want to grow up and be stylish. Check here to see how they're done


Another Martha. I love the face that shows up on the wall behind the pumpkin. Instructions here.

Pinned Image
Confession...this is a little more my speed for monograms at this point in my life. Time is limited, you know? Looks like you'd need a fairly smooth pumpkin to make it work and maybe use fabric or scrapbooking paper for the design?  Chased down the instructions here at Brown Paper Packages!

Adorable Personalized Pumpkins- Spider Web
Last but not least, because I think it's a cutie and it combines fun with simplicity...The lady who made this sells them at her etsy shop. Clicky here.

These last two would be nice to do on fake pumpkins. I bought a couple of them three years ago and I love them. They're colorful, look real, and best of all, they don't melt into a puddle when I forget to throw them out soon enough!

Happy Halloween!

One Crazy Lady

Friday, October 28, 2011

Pumpkin Scones Recipe, Starbucks Style

I tried my very first Starbucks scone last weekend. It was delectable.
This morning, I checked my email and found a blog alert from RecipeGirl for her version. You can find the recipe here, at her blog.

***UPDATE 3/13*** - I tried this pumpkin scone recipe and I am in love. Seriously.
If they taste anything like the Starbucks version, as she says, then let me tell you, they are fantastic! She put solid layers of her plain and pumpkin spice glaze on each scone, rather than drizziling the spice one as Starbucks did.

 I like the look of the drizzly, but thinking all the extra flavor of more spice....mmmmm.....decisions!

This is a recipe I want to try. Now. Thanks, RecipeGirl!

Monday, October 10, 2011

Peter, Peter, Pumpkin Eater...Pumpkin Recipies for Fall

I love October. The air is cooler and the leaves are starting to change and fall. It makes me think of rain, hot cocoa, a good book, and a fire in the fireplace.

...And makes me hungry for pumpkin....


Came across this recipe for Pumpkin Fudge at Recipe Girl. Can't wait to try it out. Something about it just grabbed me. It was probably the word "fudge".


Then there's a recipe for Pumpkin Cream Cheese Truffles at Erins Food Files (not me...another Erin with great taste). OK...so they sound a little strange, but in a good way, right?  =]


...And Cream Cheese Rippled Pumpkin Bread from Lick the Bowl Good....Really, really want to try this one. We make a whole wheat pumpkin bread that is to die for. Yep. Whole wheat, and still great. If I have time to cook in the near future, I'll make it and post the recipe.


...And Pumpkin Pie Cupcakes over at Une-Deux Senses. These have a graham cracker base with vanilla cake and pumpkin pie frosting.

Pumpkin Cinnamon Rolls
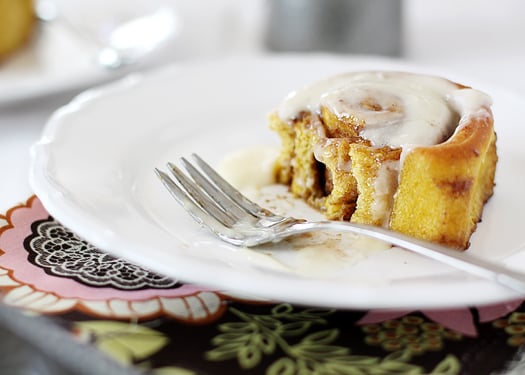
...And Pumpkin Cinnamon Rolls from Goodlife Eats...


Which lead me to another of Goodlife's recipies, this one for Pumpkin Pie Oatmeal. Now, I am not an oatmeal fan, it's just a bit too slimy for me, but this looks more like dessert. Crunchy, sweet, and healthy enough that I can feed it to the kiddos in the morning and not feel guilty about it.

Who needs Halloween candy?

Thursday, September 1, 2011

Thrift Store Cedar Chest - Refinished

Remember the thrift store bargain I bought last month? You can check it out here.

I made the kids haul the chest outside for an after picture so I could fiddle with Picasa and try a split view photo. I have a renewed respect for those types of pictures now. Ug. Leaving this one as is until I have more time to play with it.

Here's the re-do. =]
One  half used can of Jasco and my very favorite gloves.....
I applied the Jasco with a cheapie brush.Wear shoes if you try this. You'll thank me for these words of wisdom. Glops of stripper between your toes and on the bottoms of your feet are not fun. No, I didn't go in the house and put shoes on after I burned my toes the first time. I'm tough...or something like that.
I waited two minutes before removing. It didn't work so hot. Wait 10 minutes. Really. The can knows what works best. Then remove with a putty knife. This is when you are going to wish you spent $3 and bought a new pair of favorite gloves, because all those splits in the rubber mean that goop is now burning fingers...
With a damp rag, wipe off the excess goop and sand....
Remember that broken base? Oh, how I wanted to rip the whole bottom off and replace the base with some round, ball type wooden feet. Then I priced them and realized I really didn't want to spend $50 on my bargain chest right now and decided to fix it instead.

I traced out the broken section and use a scroll saw to cut a new piece out of some scrap oak I had in the garage. Bargain girl strikes again.
The new wood isn't as thick as the original, but the difference is only visible from underneath. Both pieces of wood were predrilled before they were glued and screwed together. 

OK...I'll confess. I didn't drill the holes quite big enough for the screws, so when I put it together, the darn thing was a pain and shifted a bit. I left it. I know. Bad.
What am I doing here? Removing color #1. Yes, I tested it first. Yes, it was perfect. Yes, it looked awful on a larger piece. I used Minwax Polyshades, a stain and polyurethane in one. I used it to redo my kitchen cupboards a few years ago. They turned out blotchy and uneven. I almost cried.

I decided I'm better now and this miracle all-in-one would work this time. I was wrong. It's STILL a pain to work with. Do yourself a favor and don't bother with the stuff. I will never use it again.

This is the point where my camera broke and you're going to miss out on a bunch of exciting picture possibilities.

Like Putting on Stain. You do this across the grain. Who knew.
And Wiping off Stain. You do this with the grain.
And Painting on Verathane. It goes on milky white and dries clear.
See? Exciting stuff!

The trunk in its new home....and for the record, it really does look much better in person.


Thursday, August 25, 2011

Ugly Duckling Cedar Chest

I found a treasure chest at my favorite thrift store. It was a poor, homely, wobbly, crayoned chest sitting forlornly by the door as we were leaving. It was ugly. Really. I almost didn’t look at it twice. The finish was a white washed, peeling oak. The back of the base was broken off on the right side so it tipped drunkenly if you sat on it. It looked kind of…ugg…outdated. Not my style at all. But it was a Lane, so I looked anyway.
Then…drumroll…we opened it up. Inside was the most beautiful, pristine cedar. It was in mint condition, with original tags and all. October 1954.  The chest was 57 years old and in amazingly good shape despite the cosmetic mess. I bit the bullet and plunked down $38, called my sister and begged for her truck, then carted that baby home.
Please ignore the messy porch. This is my high tech workspace.
Lovely, eh? Filthy, scribbled, gouged, and I think that spot in the middle is a burn mark.
I actually fell in love with this little scribble. My oldest child's name starts with the letter "B", and I still remember finding those first scrawled attempts of name writing on walls and, ahem...dressers. It kind of made this chest belong to us in a way. Know what I mean? I could just picture a little boy standing there with his pen and smiling at his perfect "B". Amazing how a few years distance makes those things sweet!
 This is the broken base. Simple and fixable, but enough of an issue to scare away some would be buyers at the thrift store. Lucky me.
Here you can see just how nicely the inside was preserved. With the exception of the deteriorated green tray, the rest was beautiful. 
I showed my find to my mother-in-law, who, can you believe it, used to own the 1953 version of the exact same trunk. I believe she got it as a high school graduation present. I felt a little bad about calling it butt ugly before showing it to her. Sigh. One day I'll learn.
Hang in for the transformation from Ugly Duckling to Beautiful Swan. It was fun, relatively simple, inexpensive, a learning experience, and well worth the effort.